
This article is all about how we can connect our Bubble app with an S3 bucket. It is an AWS cloud storage where we can save our data. S3 bucket revolves around simplicity you don't have to be an expert to connect its services with your project if you are planning to use cloud storage it is the best thing to do as it lets you store data in a range of storage classes. You have to follow the following steps to connect the S3 bucket with your bubble application.
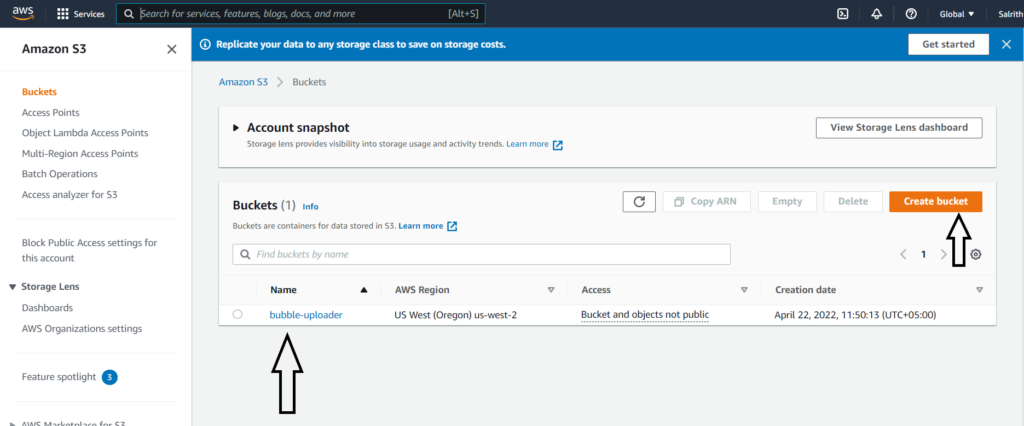
First things first you need to set up an S3 bucket on AWS so you can connect it with your bubble application to do it you have to go amazon AWS website and search for an S3 bucket. When you open the S3 bucket tab on Aws you will have to create a new bucket from there and just have to name and leave the rest of the settings to default when you are creating the bucket. Once you created the bucket you will see its name on the S3 bucket dashboard buckets list
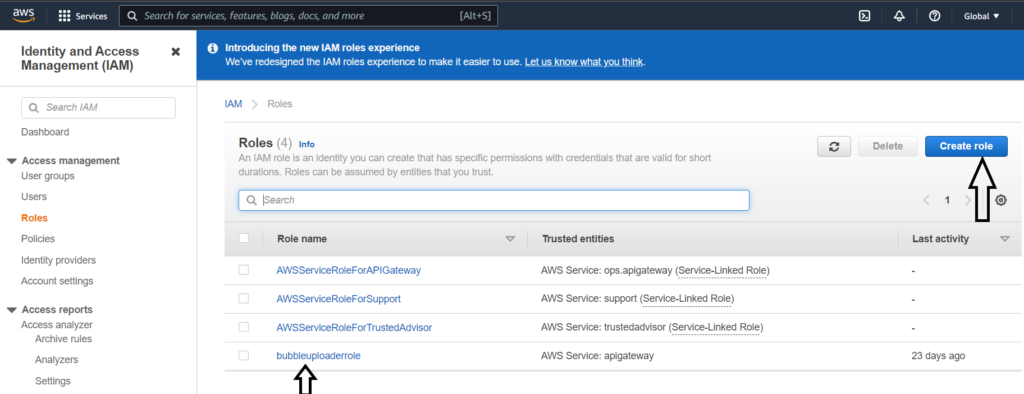
A role is like a virtual user anytime you interact with an AWS service like API gateway, S3, or lambda you typically do it by using a role. The role has permission attached to it and those permissions are defined as policies. So to access the S3 bucket we need to define a role and attach a policy to it. To do that we have to go on IAM: identity and access management dashboard on AWS and from there we have to click on create role button and select a trusted entity which in our case will be an API gateway and then we have to name our role and that’s it you will see your newly created role on IAM dashboard. Click on the newly created IAM role you see on the dashboard and a new tab will open where you can see a button of add permission click it and search for the S3 bucket and now you will have access to everything in the S3 bucket
There is an ARN link on the IAM dashboard copy it and then open the API gateway tab from the AWS search bar. There will be multiple API options that you can build from there choose the rest API to build it.


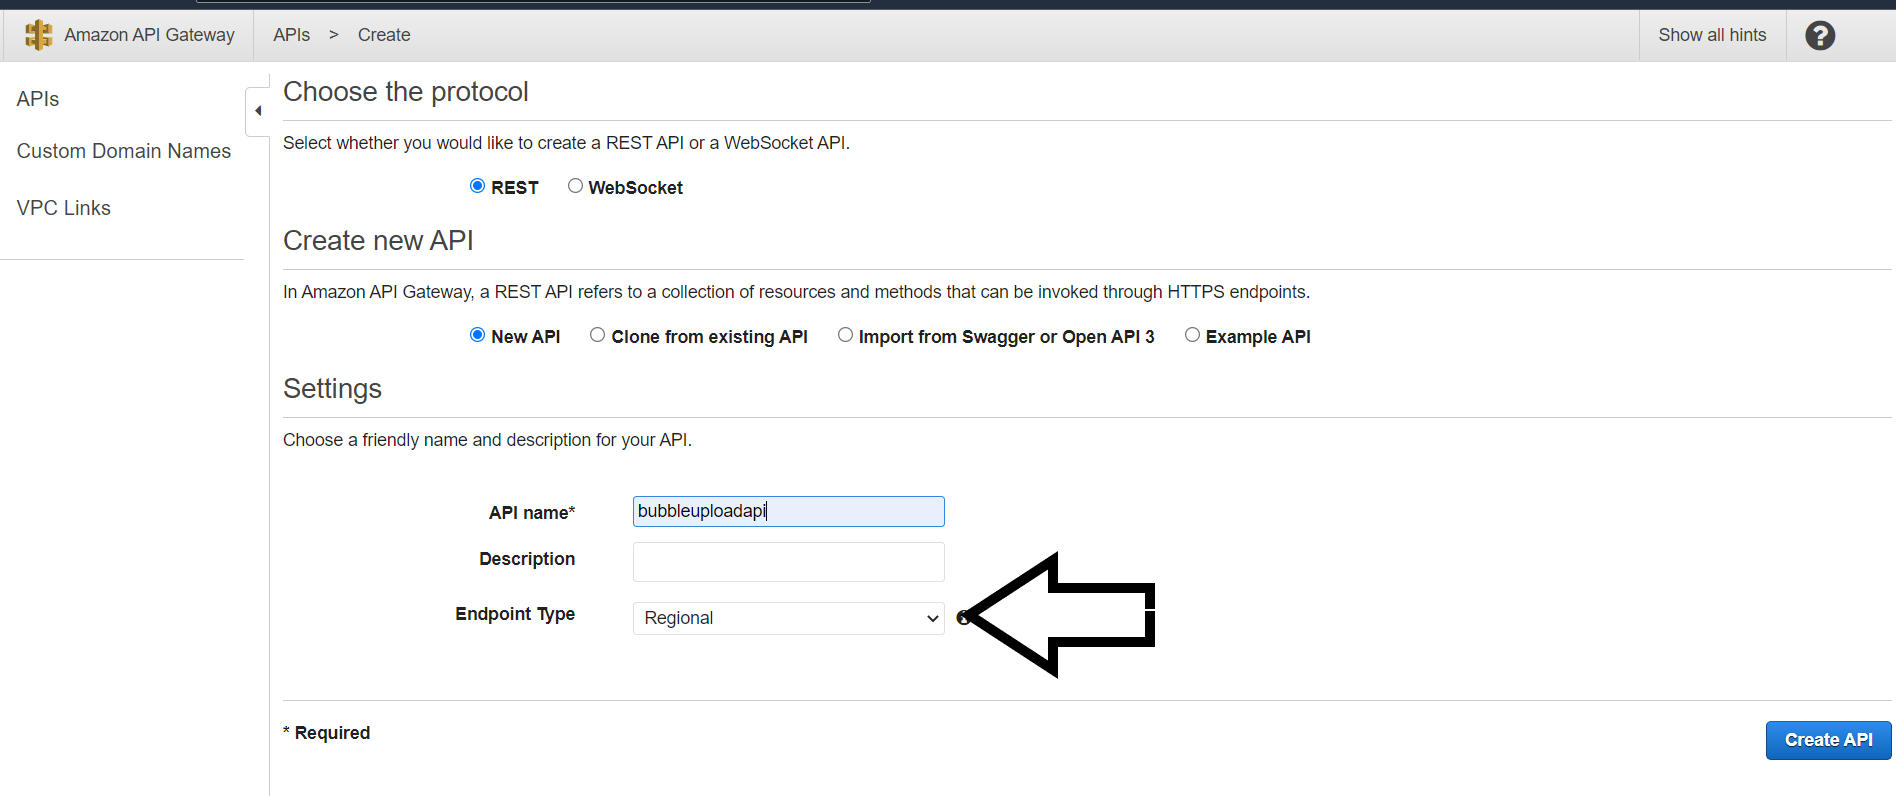
When you click the rest API build button there will be a new tab where you have to name your API make sure to choose the endpoint option “regional”. Then click on create API a new tab will open where you can set up your API and connect it with your bubble application.
1.Create a new resource by clicking the create new method button and selecting a new resource from the dropdown
2. Create the resource bucket first and name it
3. Create the resource of file that we need to provide to the API and name it
4. leave the resource path in both resources to empty
5. Open the resource of the file you created
6. paste the Arn link in the resource of the filename that you created on the IAM dashboard
7. click on the action button and select the deploy API from the drop-down from where a new screen appears where you will get the invoke URL that you can provide to your bubble application


As you have done all the hard parts the last and probably the easiest thing is to connect your bubble application with your S3 bucket. For this, you need to install a plugin from the bubbles plugin named “Toolbox” that will help us to run the Javascript once we create a button in a bubble application, and in its workflows, we can use our API with the help of Javascript to send data to our S3 bucket. keep in mind you need to provide the file you need to upload in the javascript function. There will be two functions in your javascript code one will be for uploading the bubble file and the other for the post request.

Like the blog? Check out our latest blogs for more bubble.io tutorials. Happy Bubbling!