
Sania Saeed

Bubble.io is a no-code platform that allows you to build your applications smoothly without writing a line of code. But what if my app needs that amazing piece of code that I wrote last week? How can I integrate that into the app smoothly?
Off course, there is no denying that like many other things bubble.io might have its limitations when it comes to no code, seriously not a line. Then why so many people on Earth, (as we know of yet) are using it? It’s the ability to “customize it to your needs”.
How can I customize it? The answer is simple Plugins
Well before developing one, you need to know what they are. By definition, Plugins are software add-ons that allow customization of computer programs, applications, and web browsers – as well as customization of website content.
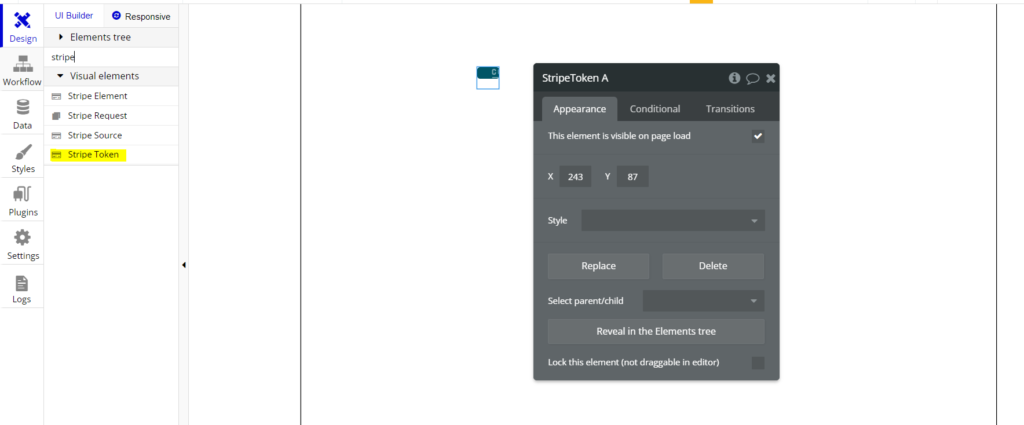
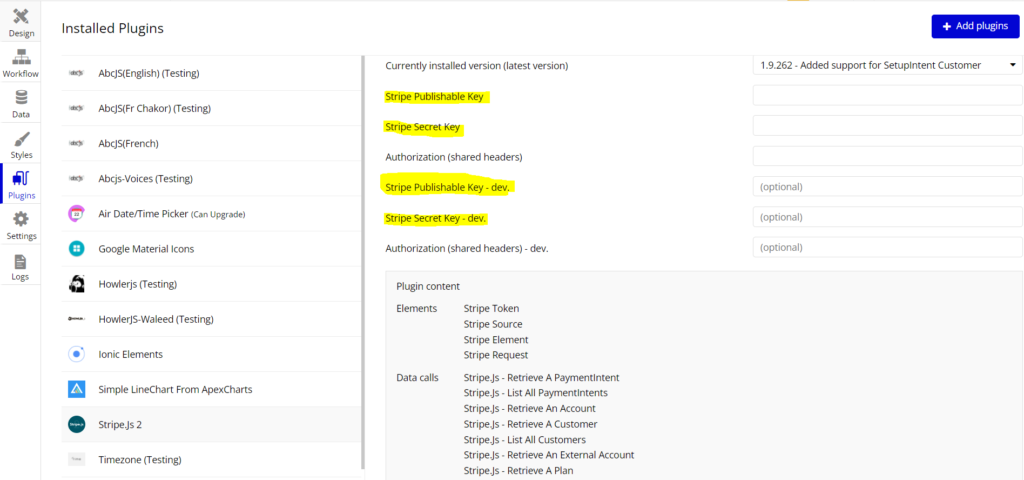
Here is a list of elements (discussed later) that the stripe plugin offers to integrate stripe into your application.
Now that we know what plugins are let’s have a look at what they look like in bubble.io.
To access the plugins tab in your bubble.io account, click on “my plugins” top left of the page under Home.
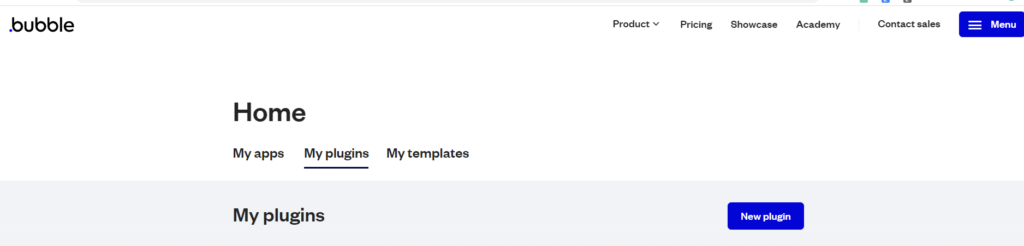
Click on “New plugin” to create one, name it and it’ll take you to the plugin editor.
The Bubble.io plugin editor follows a similar structure to its application editor, structured in 7 tabs.
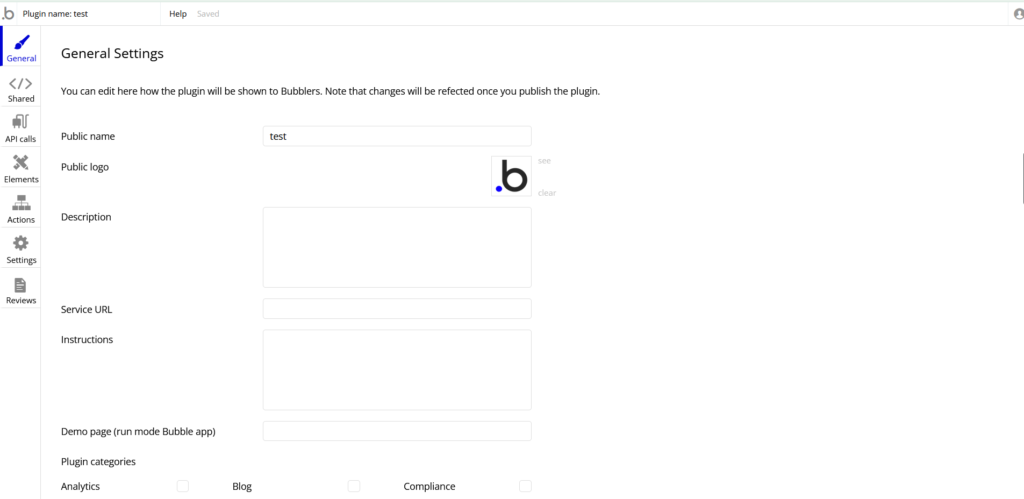
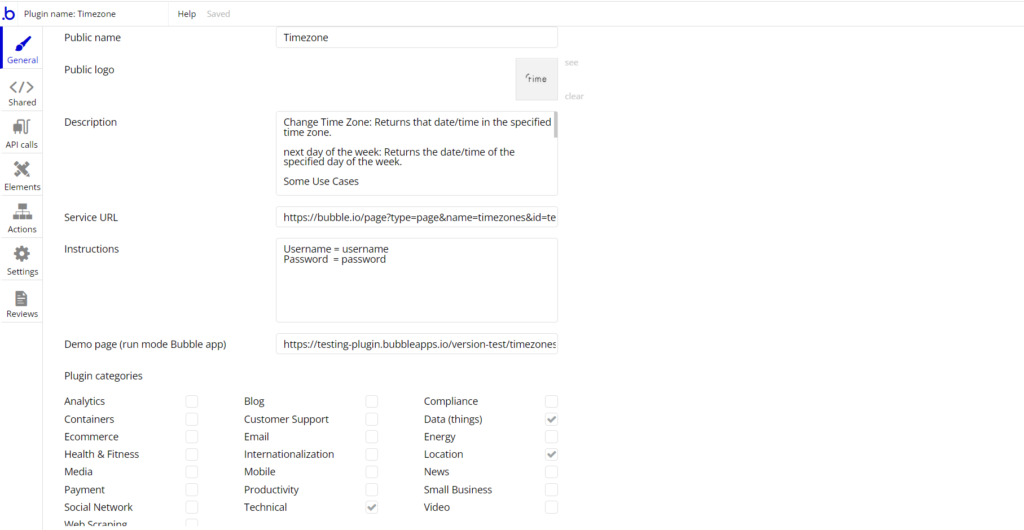
This is where you define how the plugin looks in the library and some keywords (SEO) to improve its visibility.
To elaborate you can modify the plugin’s name, logo, description, and URL, and select relevant categories for your plugin. This will help to make your plugin searchable by other Bubblers.
Here is an example.
This is where you define the shared technical aspects of your plugin (shared HTML header, assets, etc.)

Don’t know what these settings are? No worries at all I am here to help. Let’s look at all these “settings” one by one.
This is the version log of the plugin editor. I recommend you always use the latest one.

If you wish to build an element that requires jQuery 3, check this box. The API will give you access to the jQuery.
If you want to insert some custom HTML in all the pages of an application that uses your plugin, you can enter that HTML here.

Please remember that the only valid header tags are <script>, <meta>, and <link>. All the invalid header codes will become a part of the body due to the automatic repair logic used in most modern browsers.
If you want your plugin’s users to enter some keys in the Plugins tab, you can enter these key definitions in this tab.
These keys will be made accessible in the context object that is sent to all the functions used in your elements and actions (discussed later on).

If your plugin requires assets like JS files, images, and CSS files, you can upload them here (Bubble’s storage) and use their URL in your code.

Phew… that was a lot for just a brief. Please fasten your seat belts because you are in for a long (but instrumental) ride.
Let’s move to the API calls
What? You have has some API calls in your custom code.
Oh no no no, don’t worry at all just like you can connect your app directly to APIs in the application editor, you can do the same things in the plugin editor too.
Here is an example of the API Connector in the Application editor.
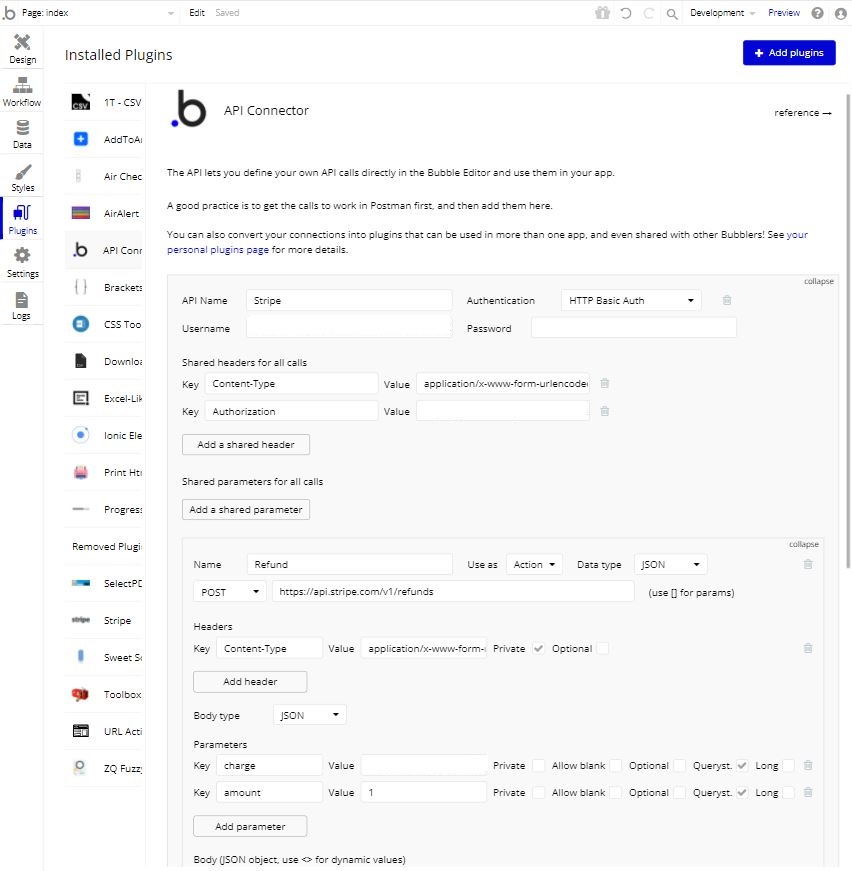
You get a similar view and some extended functionality in the plugin editor.
As mentioned in Shared Tab under “additional keys”, you can access the API keys in other tabs of the editor.
Well, I am not here to teach you about APIs and how they work. All I can help you with is providing a great example of the APIs plugin and letting you discover it there.
Good Luck guys.🍀
Finally, welcome to the core, the most important part, the part you want the most. The Elements, well the actions too, which is coming right up.
Let me divide this portion into simpler and smaller parts for better understanding.
Here you define specific properties of your plugin.
General: give your element a name, icon, and category (Visual or Input), which helps the user to navigate your plugin better.
Bubble Properties: these are the properties your element will have in the application editor.
Default Dimensions: the dimensions your element will have if it is not resizable.
The best way I would recommend you is to keep a plugin editor open on your and to navigate all the items there as we move forward.
The fields are similar to “arguments” a term you are familiar with. These are customizable and accessible in the application editor. The field is directly accessible in the “update action”.
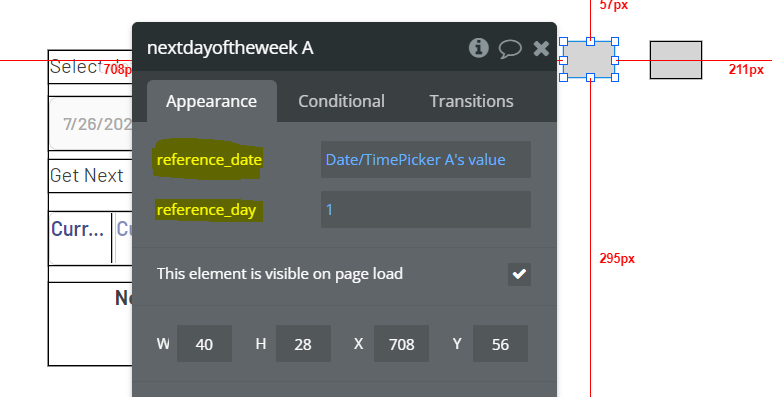
The reference_date and referance_day are fields for the plugin timezone.
Just like you can assign states to any element in the application editor you can also do so in your plugin.
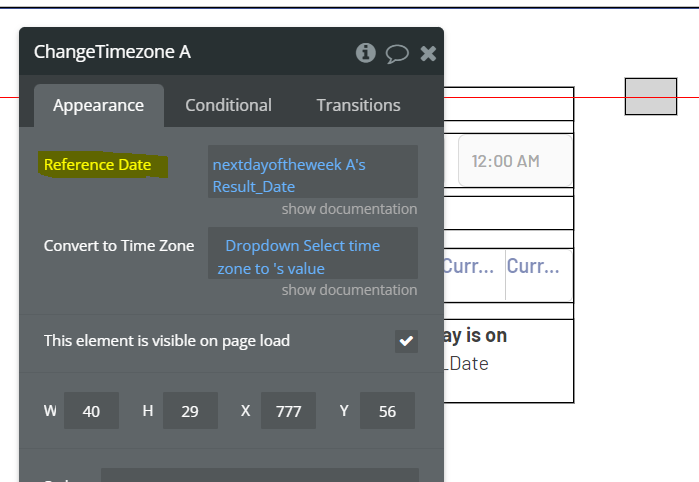
Here the Reference Date (a field) gets value from another plugin element nextdayoftheweek’s state Result_Date
These are the trigger-based events when something happens or something is calculated, for instance, in the case of Stripe there is an event that states “a stripe request payment was successful”
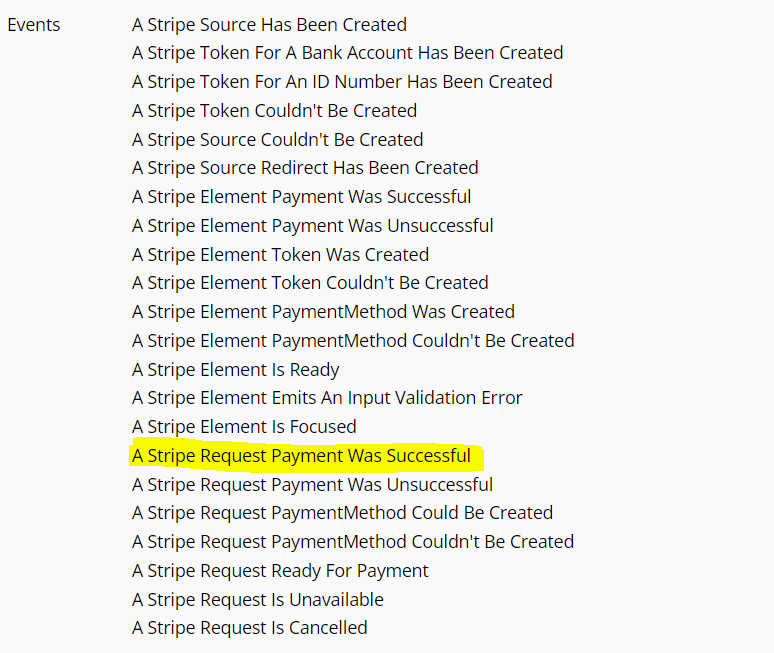
What happens behind the scenes is that Stripe checks if the payment was successful, it then triggers this event. What this means is that in the application you can check when the payment was successful and define your flow of actions after it.
The actions generally are equivalent to the methods we define but these specific ones are the actions that are used in defining the element. These actions are named “initialize” and “update”. The names are pretty self-explanatory, but we will take a deeper look into them in our custom example. 😉
The HTML header that you write here would only be integrated into the application page having the element. Whereas, the Shared Header discussed above copies the code to all the pages of the application.
The actions/methods you want to trigger in the application workflows, you define here.

After you have defined the name here you scroll to the page end and there it is, the space for you to code in it.
You can also define the fields/arguments for each of the actions too.
Alright, alright I know it’s getting long and long, believe me, this is the last item in elements.
What I mean by custom-made actions is that these are the actions that we don’t want in the workflows but we want them to help us refine our code and calculate something separately.
All you need to do is define these functions inside of your main action like a child.
For instance, a callback function can be defined inside an update action or your own defined ones.
The actions you define in this tab are the actions you can access under your workflow actions in the application.
General properties
This is where you give the action a name, and a category and define its type (Server-side, Client-side).
Fields
The fields are the arguments you will access in the action code.
Return Values
These represent the output or the result(s) of your method.
You might have seen them in the application editor as below
Remember these act as keys of a JSON object, you will have to provide some value against them to achieve the above functionality.
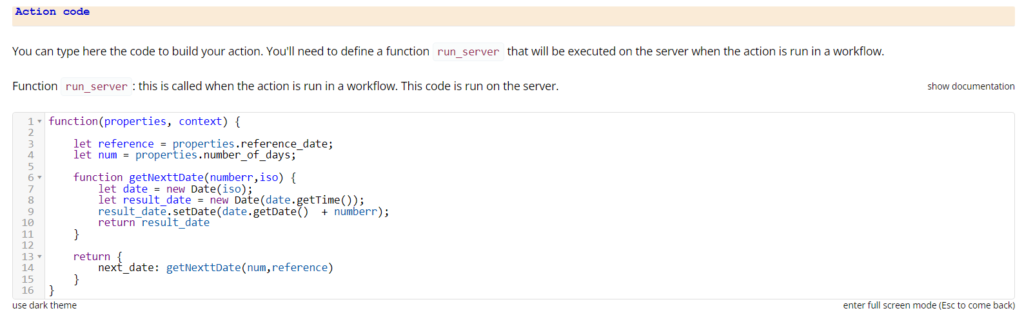
Action Code
This is the part where you write your actual code.
Bonus
Bubble.io also allows you to use node modules in the actions tabs, simply check the following box, add the modules under dependencies and you are good to go.
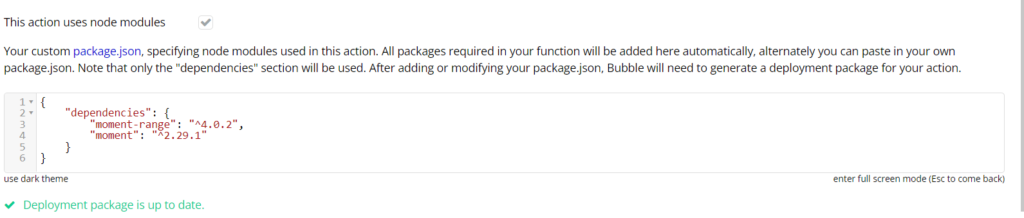
The great part, Bubble also notifies you if the packages are included correctly or not.
Okay Okay, I know you are done creating your plugin and wanna make it official. Let me show you how to do that.
This “Settings” tab allows you to publish your plugin, see the version history and pick a license.
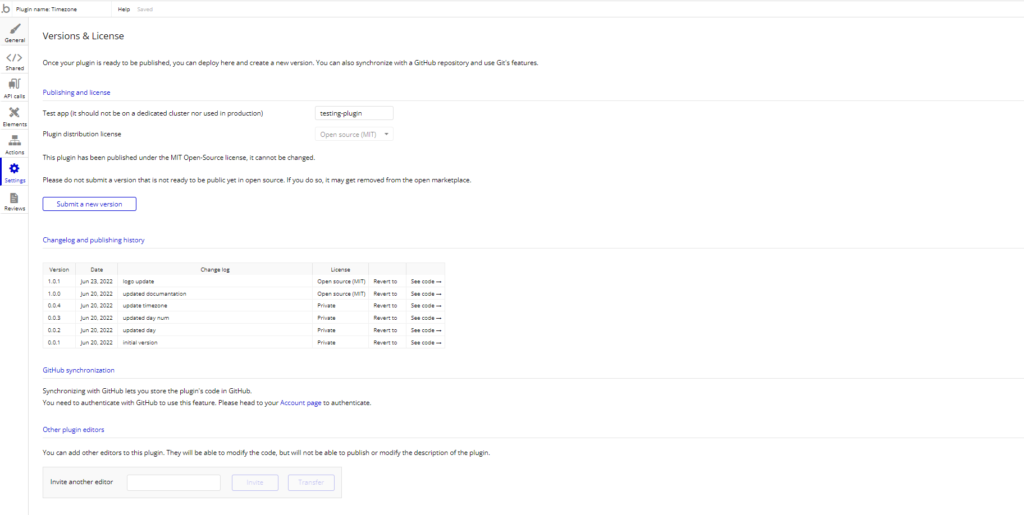
Allow me to show you around this tab.
You remember the test app. Now you need to select a license under which you would be publishing your plugin i.e; Private, Public (MIT), or commercial.
Oh, such mouthfuls…
To make your plugin accessible to the bubble applications, you need to submit a version. Simply click on submit a new version and give it a name you like.
Please remember that the primary data store remains Bubble’s servers, and what you have on GitHub is a copy of the plugin.
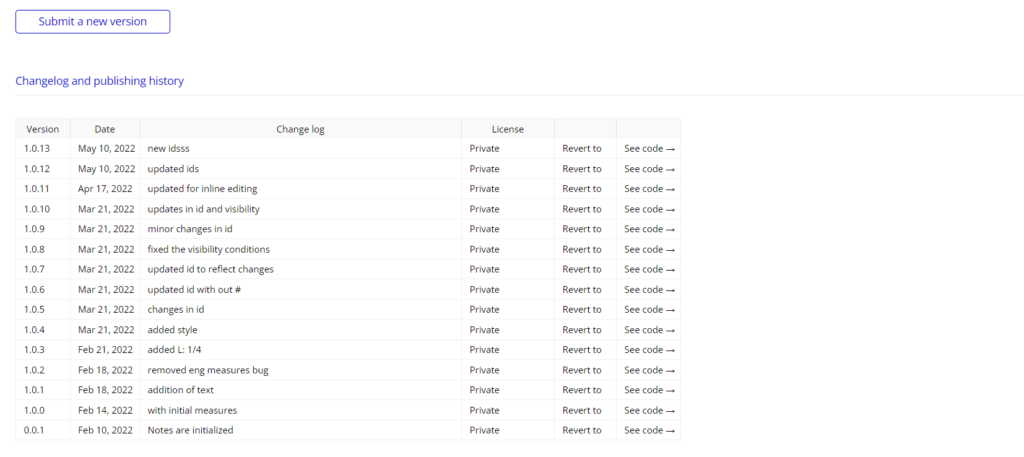
You can also keep track of all the versions you have posted, integrating each change in the plugin.
Let’s say you are a die-hard coder who uses a GitHub account or you just want to save the versions of your plugin in a repository and take advantage of Gits version control features. Bubble.io has got your back, it allows you to connect and sync your plugin code over GitHub.
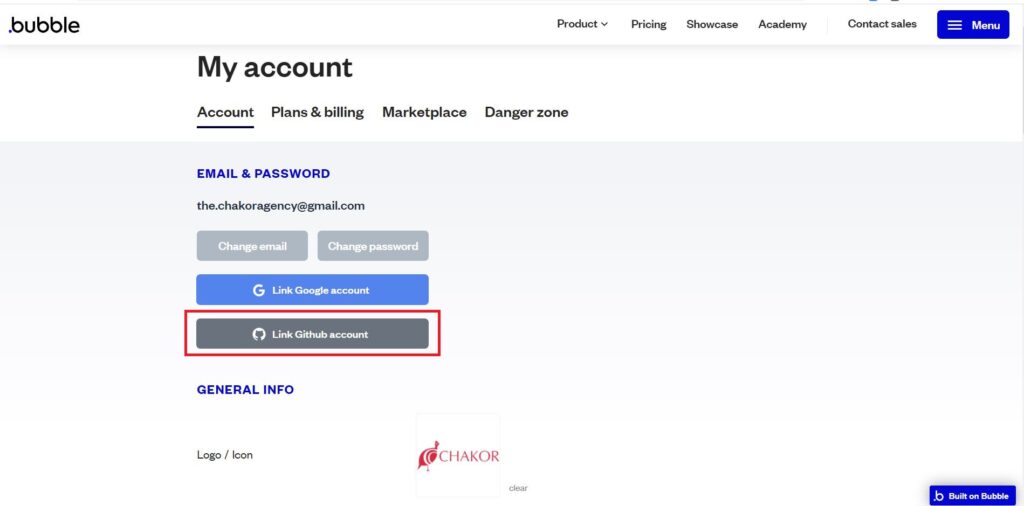
To do so, head to your account page.

link to your GitHub account here.
Here are a few cases that can occur during the synchronization.
Bubble.io also gives you the ability to Fork Plugins. The two key things to remember. First, you will automatically get the main branch (the copy of the plugin), already structured into folders. Second personal data and credentials, you use for testing purposes, like API keys won’t be synchronized with GitHub.
You work in a team, Bubble.io got you covered. Just add the bubble.io account’s email address of your team member and he/she will be able to modify the code.
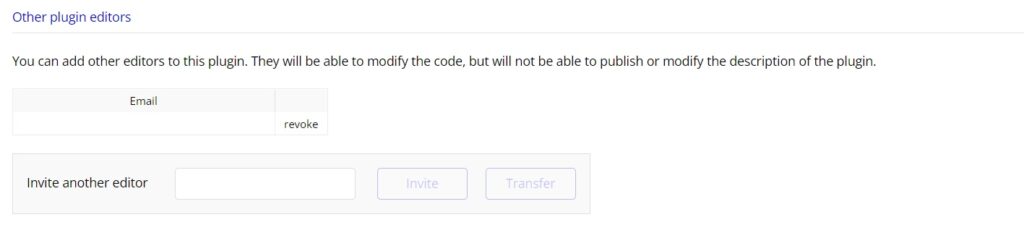
Remember your teammates won’t be able to publish or modify the description of your plugin.
This tab strictly belongs to the statistics part of the plugin. You can see how many people have downloaded your plugin.
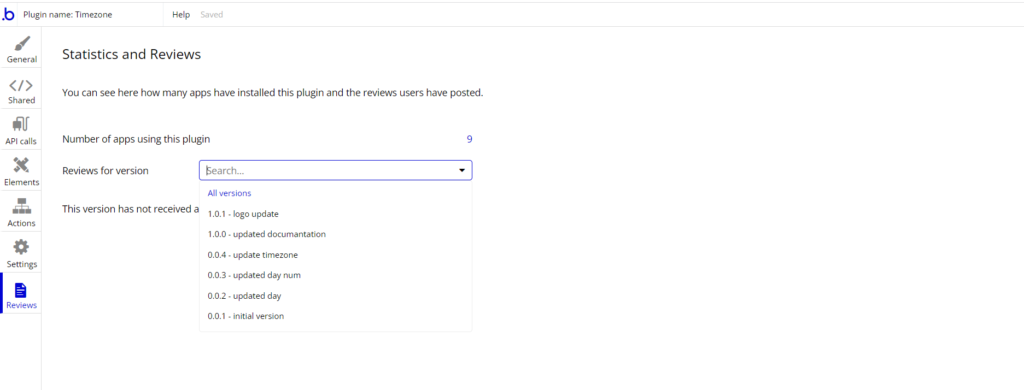
You can also have a look at what people have to say about it— one version at a time.
Whew, what a long, educational, and plugin sage level ride we took just now. I hope you’ll use this knowledge as something to look back on whenever you feel stuck in your plugin development.